Measuring a window for replacement is a skill that saves time and money. In this guide, we show you how to measure a window accurately. Follow these steps to avoid mistakes. We use clear language and a friendly tone. You will learn the tools you need and the steps to take. This guide contains practical advice and simple instructions.
Why Accurate Measurements Matter
When you plan a window replacement, accurate measurements prevent wasted money and materials. They also make installation smoother. A wrong size can lead to delays and extra expenses. For homeowners and professionals, proper measurements are essential. The right size means a snug fit and proper energy efficiency. In short, accuracy makes all the difference.
Consider a scenario. A homeowner ordered new windows based on poor measurements. The windows did not fit well. They needed to be re-measured and reordered. This extra work added cost and time. By measuring correctly the first time, you avoid such issues. Think of accurate measurements as the blueprint for your project.
Tools You Will Need
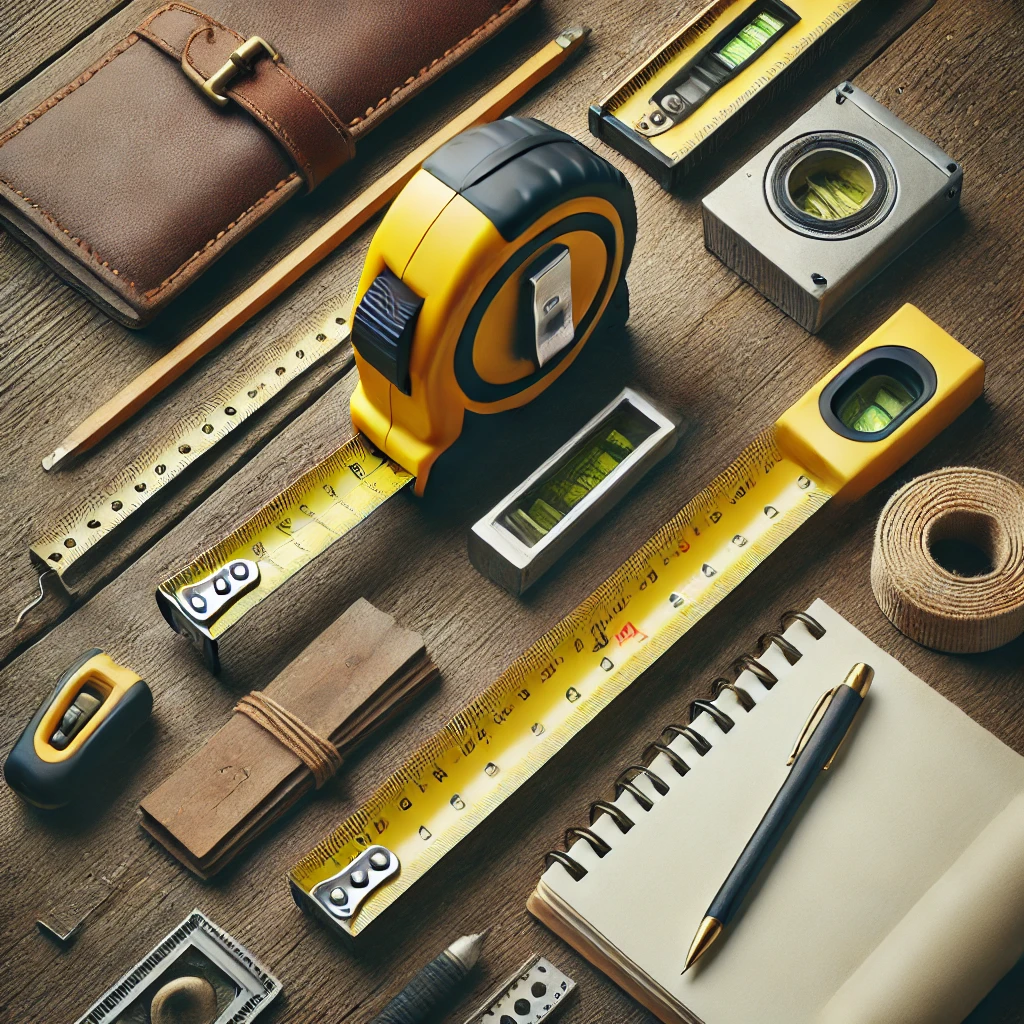
Gather the proper tools before you start. You will need:
- A steel tape measure – Use one with clear markings.
- A pencil and paper – Record your measurements immediately.
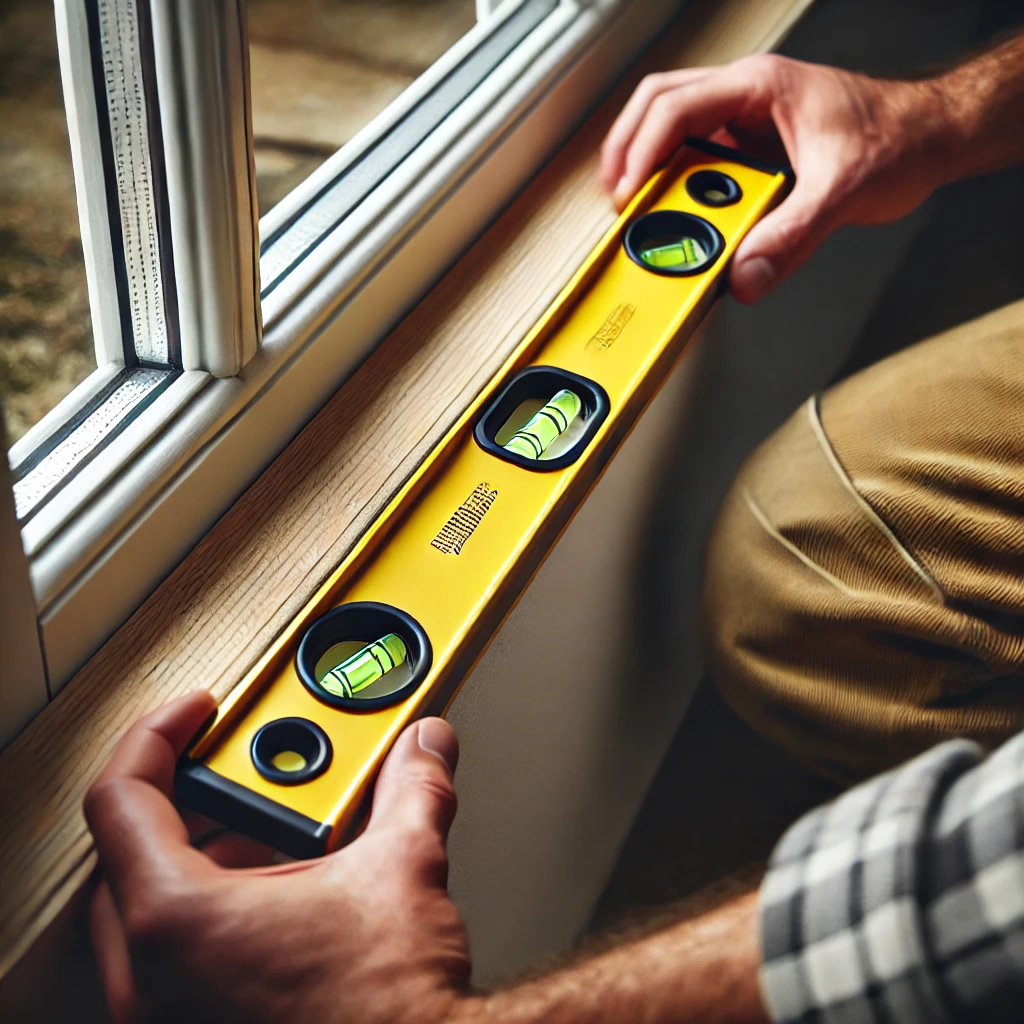
- A level – Check if the window opening is even.
- A notepad – Jot down any details you notice.
- A helper – Extra hands speed up the process.
A steel tape measure gives reliable measurements. The pencil helps you note details that matter. A level keeps your work true. You might also use a smartphone app as a backup. Each tool plays a part in a smooth process.
Types of Windows and Measurement Considerations
Single-Hung and Double-Hung Windows
Single-hung windows have one moving part, while double-hung windows move both sashes. Measure the width from one side to the other at three points: top, middle, and bottom. Use the smallest measurement. This accounts for any irregularities in the opening.
Measure the height in three places as well: left, center, and right. Again, choose the smallest number. Repeat this process for every window. Consistency matters. Always measure more than once. Double-check your numbers before you record them.
Sliding Windows
Sliding windows move horizontally. Measure the width by checking the entire opening. Then, measure the height at the highest point and the lowest point. Write these numbers down. A level will help you check that the frame is straight.
Casement Windows
Casement windows open outward or inward. Their frames may have a slightly different shape. Measure the width and height of the frame carefully. Look for any warps in the wood or metal. Warped frames can affect the measurements. In these cases, measure in more than one spot.
Bay and Bow Windows
Bay and bow windows extend beyond the wall. They have several panes that meet at different angles. Measure each section separately. Then, combine your numbers to get the total size. Work slowly and record every measurement. These windows require extra attention.
Step-by-Step Guide to Measuring Your Window
Step 1: Prepare Your Workspace
Clear the area around the window. Remove any objects that may block your view. Gather your tools and stand in a safe spot. A calm work area reduces errors and makes the job less stressful.
Step 2: Measure the Width
Start at the top of the window opening. Place your tape measure at one edge and stretch it to the opposite edge. Read the number clearly and write down the measurement.
Repeat this at the middle and bottom of the window. Compare the numbers and use the smallest measurement as your width. A slight variance may occur due to settling or poor craftsmanship. Always choose the smaller number. This step keeps your measurements conservative.
Step 3: Measure the Height
Measure the height on the left side of the window. Place your tape at the top edge and extend it to the bottom edge. Write down the number.
Now, measure the center and the right side. Record each measurement. Use the smallest number as your height. This practice avoids issues with uneven frames.
Step 4: Check the Diagonals
For extra caution, measure the diagonals of the window opening. Measure from one top corner to the opposite bottom corner. Do the same for the other pair of corners. The two measurements should match closely. If they differ, the frame may be out of square. In that case, use the smaller measurement from your width and height calculations.
Step 5: Record Your Measurements
Write down all numbers neatly. Use a table if needed. For example:
| Measurement Area | Width (inches) | Height (inches) |
|---|---|---|
| Top | 36 | – |
| Middle | 35.5 | – |
| Bottom | 36 | – |
| Left | – | 48 |
| Center | – | 47.5 |
| Right | – | 48 |
This table helps you compare and choose the smallest numbers. Accurate records support the ordering process.
Step 6: Re-Check Your Work
Before you finish, double-check every measurement. A second look avoids mistakes. Ask a helper to verify your numbers if possible. Small errors now can lead to big problems later.

Practical Tips for Accurate Measurement
- Measure Twice, Order Once: A re-check saves trouble later.
- Use a Reliable Tape Measure: Old or worn-out tapes can give wrong numbers.
- Record Immediately: Write down your numbers as you measure to avoid forgetting details.
- Take Notes on Oddities: If the frame is not straight or has gaps, note it down. These details help when you speak with a professional.
- Ask for a Second Opinion: A friend or professional can spot mistakes you miss.
Imagine you measure a window in the early morning. You note a slight bend in the frame. Your helper sees this too. Together, you decide to record the variance. When ordering the replacement, you share this detail with the supplier. This teamwork prevents future headaches.
Common Measurement Pitfalls
Rushing Through Measurements
Do not hurry. Speed can lead to errors. Measure slowly and double-check. It is better to take extra time than to redo the work later.
Ignoring Small Variances
Minor differences in measurements may seem unimportant. They matter. A half-inch difference can lead to a poor fit. Use the smallest measurement you find.
Using a Faulty Tape Measure
A worn-out tape measure may show wrong numbers. Replace old tapes regularly and use a new, sturdy measure. Accurate tools give accurate results.
Failing to Check Diagonals
Overlooked diagonal measurements can hide problems. Always check both diagonals. They tell you if the window is square.
Overcomplicating the Process
Keep it simple. Follow the steps listed here. Complex methods only cause confusion. Stick with the straightforward process. Simple steps lead to correct measurements.
How to Adjust for Different Window Styles
Replacement Windows with an Existing Frame
Sometimes you replace a window that fits inside the existing frame. Measure the opening as described. Then, compare the measurements with the new window’s size. Check the fit carefully. The new window should slide or fit without forcing. This match is important for energy efficiency.
Windows with Sash and Frame Differences
Some windows have separate sashes and frames. Measure the opening of the frame first. Then, measure the sashes. If the sashes have worn over time, take that into account. Compare both sets of numbers. The final choice should match the new window’s specifications.
Custom Windows
Custom windows may require extra steps. Measure all sides carefully. Write down every measurement. Custom work demands detailed records. In some cases, a professional may be needed. A second opinion can be helpful.
Frequently Asked Questions About Measuring Windows
Q: What if my window frame is not square?
A: Use the smallest measurements for width and height. Diagonal measurements help you spot the issue. If the numbers differ, the frame is out of square.
Q: Do I measure the window frame or the glass?
A: Measure the window opening. This measurement gives you the space for the new window. Do not measure the glass itself.
Q: How many times should I measure?
A: Measure at least three times. Two or three measurements reduce errors. A second check is always helpful.
Q: Should I use a laser measure or a tape measure?
A: A steel tape measure is best. Laser measures are useful, but tape measures are more reliable for small openings.
Q: What if my window has decorative trim?
A: Remove the trim before measuring if possible. If you cannot remove it, measure inside the trim to get the true window opening.
Q: Can I measure windows in cold weather?
A: Yes, but be careful. Metal tape measures can contract. Take your time and double-check your numbers.
Q: What should I do if my measurements do not match standard sizes?
A: Record your measurements as they are and discuss the numbers with your supplier. Custom sizes can be ordered if needed.
A Real-World Example
Consider a homeowner named Sarah. Sarah planned a window replacement. She measured the width at three points and recorded 34 inches, 33.5 inches, and 34 inches. She chose 33.5 inches as the correct width. For the height, she measured at the left, center, and right, getting 48 inches, 47.5 inches, and 48 inches, respectively. She chose 47.5 inches as her height.
Sarah then measured the diagonals. Both measurements were close, confirming that her window was nearly square. She recorded her numbers and shared them with the supplier. The supplier advised a standard replacement window. Sarah felt confident in her work. This example shows that careful measurements save time and money.
Troubleshooting Common Issues
- Inconsistent Measurements: If you get different numbers, check your tape measure. It may not be straight. Ask a friend to hold the tape measure and re-measure. Always use the smallest measurement.
- Warped Frames: Warped frames are common in older homes. Measure in several spots and note any irregularities. Share these notes with your window supplier for advice.
- Difficult Access: Sometimes, windows are hard to reach. Use a step ladder safely and ask for help if needed. Safety is important. Work slowly and carefully.
Tips for a Smooth Replacement Process
- Plan Ahead: Set aside time for measuring. Avoid rushing; a calm mind works better.
- Gather Tools: Do not start without your tools. Missing tools lead to errors.
- Double-Check: Always re-check your measurements. A second look prevents mistakes.
- Ask for Help: Do not work alone if you feel unsure. A friend or professional can make a difference.
- Record Everything: Write down all numbers. Organized records help later.
The Role of Professionals
Sometimes, you may call a professional. Professionals have the experience to measure correctly. They follow a standard process. You might choose this route if you feel unsure. Professional help saves time and avoids future errors. If you hire a professional, ask questions. Confirm that they check all areas. A good professional explains each step clearly. Their work can give you peace of mind.
Benefits of Doing It Yourself
Many homeowners prefer to measure their windows. DIY work saves money and gives a sense of accomplishment. It also helps you learn a new skill. When you take measurements yourself, you understand your home better. This knowledge can help in future projects. DIY projects build confidence and bring lasting benefits.
How to Prepare for Ordering New Windows
After you take all measurements, prepare your order. Compare your numbers with standard window sizes. If your numbers do not match, discuss options with a supplier. A good supplier offers adjustments and may have frames that cover slight mismatches. Write down any questions you have. Being prepared makes the process smoother.
A Few Final Thoughts
Measuring a window for replacement is a clear process. The steps are simple and logical. Use a steel tape measure and record your measurements accurately. Check the width, height, and diagonals. Work slowly and safely. Each step matters.
The process is like following a recipe. Each step adds to the final outcome. A well-measured window leads to a better fit, comfort, and energy savings. Every detail counts. Your home deserves careful attention.
Think of this process as a small adventure. You check every corner of your window opening and discover surprises like a slight warp or uneven trim. These details tell a story about your home. They remind you of its age and charm. This journey builds confidence and prepares you for more projects.
Recap of Key Points
- Accurate measurements are the key to a successful window replacement.
- Use the right tools: a steel tape measure, pencil, paper, and a level.
- Measure width and height at multiple points.
- Always choose the smallest measurement.
- Check the diagonals to confirm the window is square.
- Record every number and double-check them.
- If problems arise, work with a professional.
- A careful approach saves time and money.
- Keep your instructions simple and clear.
Final Q&A
Q: What is the first step in measuring a window for replacement?
A: Clear the area and gather your tools. A calm workspace makes work easier.
Q: How many times should I measure each dimension?
A: At least three times. This practice catches any small errors.
Q: What do I do if my window is not perfectly square?
A: Use the smallest measurements and check the diagonals for any large differences.
Q: Why should I record my measurements immediately?
A: Writing numbers down stops you from forgetting details and helps when ordering your new window.
Q: How can I tell if I need a professional’s help?
A: If you see large variances in your measurements or feel unsure, call a professional. Their experience can save time.
Q: What if I find small gaps or warps?
A: Note them on your measurement record and share these details with your supplier.
Q: What benefits do DIY measurements offer?
A: DIY work builds skills, saves money, and deepens your understanding of your home.
We Hope This Helps Prepare You For Your Window Replacement
By following these instructions, you can measure your window with confidence. Each step is clear and easy to follow. You do not have to be an expert to get it right. Simple tools and clear instructions are all you need.
This guide uses straightforward language and practical advice to help you complete the task without hassle. With a few humorous touches and friendly guidance, this article is your helper in your home improvement journey.
Measuring windows may seem small, yet every detail counts. With these steps, you are ready to replace your windows. You save time, money, and stress. Your home will benefit from a snug, well-fitting window. And that is a win for everyone.
Now go ahead and take that measurement. You have the tools, the steps, and the confidence to succeed. Happy measuring, and may your window replacement project be a great success!